A screen recorder used to mean one thing: capture what's on screen, save the file, done. Editing happened in a separate app. Understanding what was actually said meant rewatching the whole thing, or not bothering. Sharing meant uploading somewhere and pasting a link.
That's not how the better tools work anymore. The workflow that actually matters now runs Record → Edit → Understand → Share — capture the screen and camera, polish the take without switching apps, get a transcript and a summary out of it automatically, and hand it off however the recipient needs it. A tool that only does the first step is solving a smaller problem than most people actually have.
What makes a good screen recorder?
A good screen recorder captures clean screen, webcam, and audio at a resolution and frame rate that hold up on export, gives you a way to fix or annotate a mistake without re-recording, and gets the result into a shareable state — a link, a file, or a transcript — without a lot of manual steps in between. Beyond that baseline, the right recorder depends on whether you need AI transcription, strict local-first privacy, team collaboration, or none of the above.
What Makes a Great Screen Recorder?
Every screen recorder claims to do the basics well. The differences show up in the details — what's captured alongside the screen, how much you can fix afterward, and what happens to the recording once you stop capturing.
Capture: screen, webcam, and audio
Recording quality means more than a single "record" button. Look at:
- Screen + webcam recording. Whether the camera overlay is captured in the same pass as the screen, or whether webcam and screen have to be recorded separately and synced later.
- Microphone and system audio. Narration and computer sound (a video playing, a notification, another app's audio) are two different sources — a recorder should capture both without one drowning out the other.
- Separate audio tracks. Keeping mic and system audio as distinct tracks, instead of one merged track, matters the moment you want to mute background noise or boost narration without touching the rest.
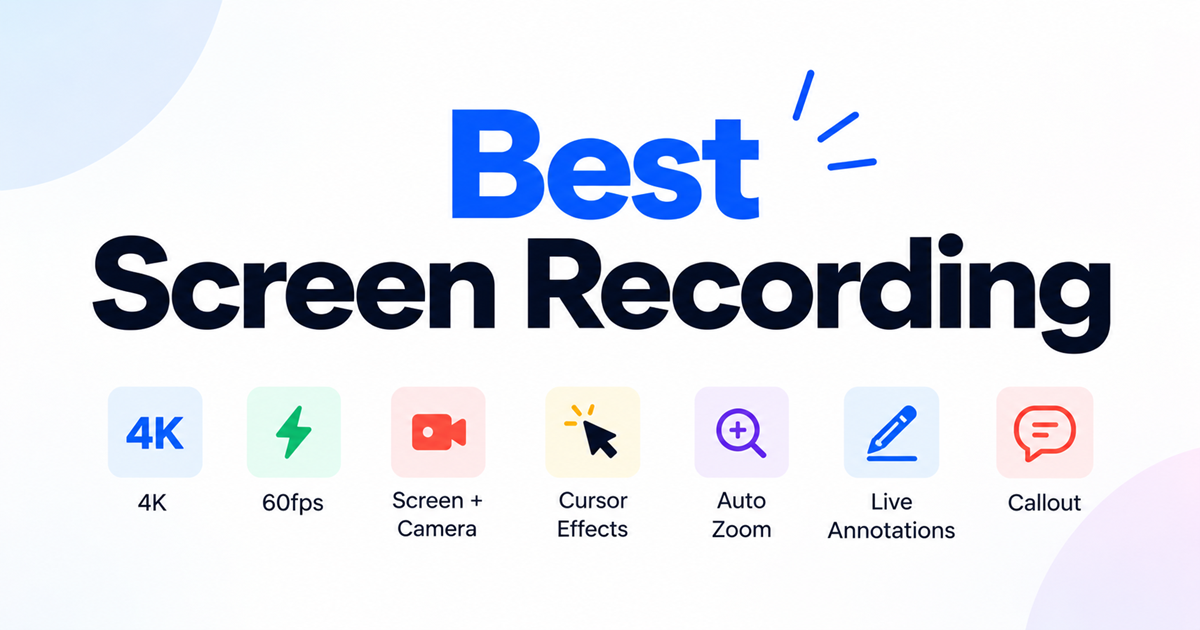
- Resolution and frame rate. 4K and 60fps hold up better for anything with fast motion or fine detail, like a terminal or a design tool; 1080p at 24-30fps is usually enough for a talking-head explainer.
Polish: cursor, annotation, and editing
- Cursor effects and click effects. Highlighting the cursor and flashing on click makes it obvious where you're interacting, which matters most on a screen with lots of small UI elements.
- Auto zoom. Automatically pushing in on the active area, usually driven by click or cursor activity, does the work a manual "punch in" edit would otherwise require.
- Live annotations. Drawing, circling, or highlighting while recording — not just after — lets you point at something in the moment instead of narrating around it.
- Editing capabilities. The real question is whether screen, camera, and cursor are separate, editable layers after the fact, or a single flattened video you can only trim.
Understanding: AI transcription and summaries
- AI transcription. Turns the recording into searchable, quotable text. Diarization (labeling who said what) matters as soon as more than one person is speaking.
- AI summaries. Extracts decisions, action items, and highlights from the transcript so nobody has to rewatch a 40-minute recording to find them.
- AI assistant. Being able to ask a specific question about a recording — "what did we decide about the deadline" — and jump straight to that moment is a faster workflow than reading a summary top to bottom.
Getting it out: sharing, storage, and privacy
- Sharing. A link, a file export, or an emailed recording with its transcript attached are all valid — the right one depends on whether your recipient needs an account to view it.
- Cloud and local storage. Some tools only store recordings on their own servers; others let you point at your own storage.
- Privacy. Whether recording, transcription, and AI processing happen on your device or on a vendor's servers — see What About Privacy? below for the full breakdown.
Fitting your setup: platform, performance, and pricing
- Export formats. MP4/H.264 covers most needs; check for 4K and variable frame-rate export if you're producing anything meant to look polished.
- Cross-platform support. Windows, macOS, and Linux support (or the lack of it) can rule a tool out before anything else matters, especially for a mixed-OS team.
- Performance. Recording shouldn't visibly slow down the thing you're recording — a laggy screen defeats the point of a demo.
- Pricing. Storage limits, AI usage caps, and seat-based pricing all affect cost very differently depending on how much your team actually records.
Key Features to Compare
Skip the marketing copy and check the same dimensions across any tools you're evaluating:
| Capability | Why it matters | What to check |
|---|---|---|
| Screen + webcam recording | Puts your face next to the content for tutorials and demos | Recorded in one pass, or does webcam need a second recording? |
| Mic + system audio | Narration and computer sound both need to be captured cleanly | Kept as separate tracks, or merged into one? |
| Cursor & click effects | Viewers need to see where you clicked, especially on a dense screen | Built in, or a manual editing step afterward? |
| Auto zoom | Draws attention to the active area without manual keyframing | Generated from click/cursor activity, or fully manual? |
| Live annotation | Lets you point at something while explaining it | Available during recording, or only in post-editing? |
| Editing after recording | Fixing a mistake shouldn't mean re-recording the whole take | Screen/camera/cursor kept as separate tracks, or flattened into one video? |
| AI transcription | Makes a recording searchable instead of just watchable | Diarized? Runs on-device or in the cloud? |
| AI summaries & chat | Turns a long recording into decisions and answers to specific questions | Can you ask a question and jump to the moment it happened? |
| Sharing method | Determines how easily a recipient can actually watch it | Link, file, or attached transcript — does the recipient need an account? |
| Storage options | Determines who controls where the file lives | Vendor's cloud only, or also your own bucket or Drive? |
| Privacy model | Determines what leaves your machine, and when | Local by default, or cloud-processed by default? |
| Platform support | Determines whether your whole team can use it | Windows, macOS, Linux — or one platform only? |
None of these are pass/fail on their own — a tool that skips local storage entirely might still be the right call for a team that wants zero infrastructure to manage. The table is a starting checklist, not a scorecard.
Best Screen Recorder for Different Use Cases
There's no single "best" screen recorder — the right one depends on who's watching the recording and what they need from it.
Best for tutorials
For tutorials, prioritize auto zoom that follows clicks, live annotation for pointing at the right spot, and clean export at 1080p or higher. Viewers are following along step by step, so an unclear cursor or a blurry export breaks comprehension fast.
Best for product demos
Product demos benefit from a webcam overlay — a face tends to build more trust on a first look at a product than screen alone — plus cursor and click effects for polish, and export settings that don't need re-encoding before they land in a deck or a landing page.
Best for developers
Developers recording a bug report or a walkthrough usually care more about speed than polish: instant screen and system-audio capture, a shareable link or file that doesn't require the recipient to create an account, and enough resolution to read small text in a terminal or IDE.
Best for customer support
Support teams need a fast round trip — record the issue, share it immediately, and ideally attach a transcript so a teammate can skim it instead of rewatching. Recording speed and simple sharing matter more here than deep editing tools.
Best for meetings
For meetings, diarized transcripts and live capture without a visible bot joining the call matter more than the recording itself — what comes out of the meeting is usually the actual deliverable, not the video.
Best for documentation
Documentation work benefits from a transcript that can be turned into written steps, annotation for pointing at specific UI elements, and export quality clean enough to pull a still screenshot directly from the recording.
Best for privacy-conscious users
Privacy-conscious users should prioritize local recording and local transcription by default, the option to bring your own AI model or API key instead of a forced cloud pipeline, and a choice of storage rather than one vendor-controlled cloud.
Best for teams
Teams need storage everyone can actually reach — a shared cloud, bucket, or drive — transcripts and summaries that don't live only on one person's laptop, and a sharing flow that still works for people outside the tool entirely.
Screen Recorder vs. Screen Recording + Editing Tool
Recording in one app and editing in another used to be the default, and it still works — but it adds friction that's easy to underestimate. A typical round trip looks like: record, export, import into an editor, manually re-sync audio if it drifted, hand-key a zoom because the editor doesn't know where you clicked, export again, then upload somewhere else entirely just to get a transcript.
Every one of those handoffs is a chance to lose information a dedicated recorder would have kept automatically — most video editors see a screen recording as pixels, not as a screen track, a camera track, and cursor/click data. A recorder that keeps those as separate, editable layers from the start skips most of that round trip: fix the zoom, restyle the cursor, or adjust the camera bubble without re-recording or re-importing anything.
That doesn't make a combined tool a replacement for a full non-linear editor. It solves a narrower problem — polishing a single take — not cutting a multi-clip video from twenty separate sources. For most tutorials, demos, and bug reports, though, that narrower problem is the actual job.
What About AI Screen Recorders?
What is an AI screen recorder?
An AI screen recorder is a screen recorder that runs the recording through a transcription and language-model layer after capture, instead of leaving it as just a video file. That typically means a searchable transcript, a written summary, or an interface you can ask questions against, generated automatically once recording stops.
In practice, that layer usually covers:
- Transcription — converting speech to text, often diarized so each line is attributed to a speaker.
- Summaries — condensing a long recording into decisions, action items, and highlights.
- Searchable recordings — full-text search across a transcript instead of scrubbing a timeline.
- Documentation — turning a spoken walkthrough into written steps someone can follow without watching the video.
- Action item extraction — pulling out specific follow-ups or decisions rather than leaving them buried in a transcript.
- Asking questions about a recording — querying a recording in plain language, like "what did we agree on for the deadline," and jumping to the relevant moment instead of reading start to finish.
- AI-assisted workflows — using what's in a recording to trigger something else, like flagging a blocked task across a team's uploads.
Not every tool that calls itself "AI-powered" implements all of these, and how well each one works depends on the underlying model and audio quality — treat "AI screen recorder" as a category with a wide range of depth, not a single fixed feature set.
What About Privacy?
Is local screen recording more private?
Yes, with a caveat: local recording only covers the video file itself. The recording, its transcript, and any AI summary are three separate processing steps, and each one can run locally or in the cloud independently of the others — a tool can record locally and still send the audio to a cloud transcription API. "Records locally" and "processes entirely on your device" are not automatically the same claim.
These are the terms worth knowing when comparing privacy models:
| Term | What it means | Why it matters |
|---|---|---|
| Local recording | Screen/camera capture is written to your device with no upload as part of the recording step. | The baseline — without it, nothing else here applies. |
| Local transcription | Audio-to-text runs on-device instead of an API call. | Determines whether raw audio ever has to leave your machine. |
| Cloud processing | Recording, transcription, or summarization runs on a vendor's servers. | Often faster or more capable, at the cost of data passing through a third party. |
| BYOK (bring your own key) | You supply your own API key to a model provider instead of the vendor's built-in one. | Puts you in a direct relationship with the model provider, not an intermediary. |
| Cloud storage | Finished recordings are stored on a vendor-managed server. | Convenient, but subject to that vendor's own retention and access policies. |
| Self-hosted / S3-compatible storage | Recordings are stored in a bucket or server you control — your own S3, Cloudflare R2, MinIO, etc. | Keeps the finished file under your own infrastructure, independent of the recorder vendor. |
None of these are inherently "correct" — a team that wants zero infrastructure to manage may reasonably prefer a fully managed cloud tool. The point is knowing which of these six things a given "private" or "secure" claim is actually describing.
How to Choose a Screen Recorder
The right choice comes down to matching a tool to what you actually record and who watches it. Before deciding, check:
- Does it record screen and webcam together, in one pass?
- Can it capture microphone and system audio as separate tracks?
- Can you annotate or point at something while recording, not only afterward?
- Is editing — zoom, cursor, camera — built in, or a separate app?
- Does it transcribe automatically, and is that transcript diarized?
- Can you ask questions about a recording instead of rewatching it?
- Where does the recording, and its transcript, actually live?
- Does it run on every platform your team actually uses?
- Is pricing based on storage, AI usage, or seats — and does that match how much your team will actually record?
If most of the answers point toward "runs locally, edits in place, understands what's in the recording," that's a narrower category than screen recorders in general — see the next section for one option built specifically around that combination.
Doculigent
Doculigent is one option built around that Record → Edit → Understand → Share workflow, with local-first privacy as a default rather than a paid add-on. It's an open-source, native desktop app for Windows, macOS, and Linux — the code is public on GitHub.
What it covers, concretely:
- Screen + camera recording in one pass, at full resolution, exporting up to 4K at 60fps. See Screen + camera.
- Camera bubble that can be reshaped, resized, repositioned, and background-blurred. See Camera bubble.
- Microphone and system audio, kept as separate tracks in Advanced Recording mode — see Record.
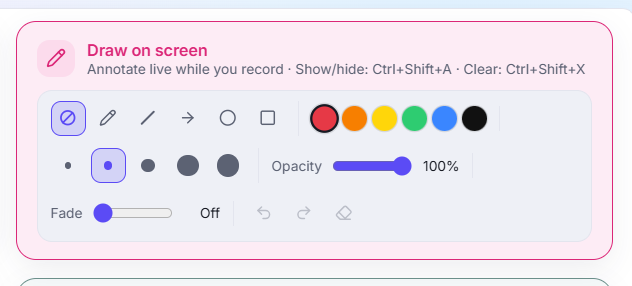
- Live annotation while recording — pen, arrow, circle, and highlight tools, without pausing the take. See how to annotate while recording.
- Auto-generated zoom from click activity, plus cursor and click-effect styling, editable afterward in the Timeline Editor. See advanced recording & editing and how to customize your cursor.
- On-device, diarized transcription by default — audio doesn't need to leave your machine to get a transcript. See Transcribe.
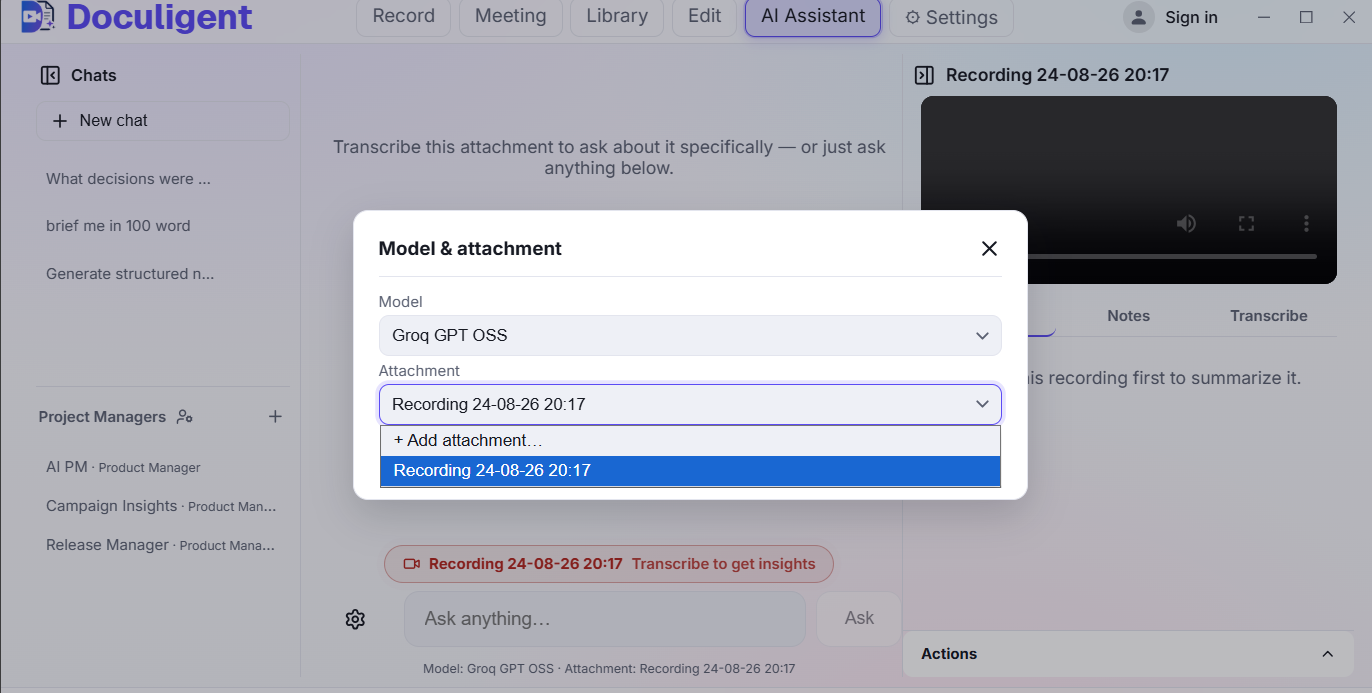
- AI summaries and chat-with-video — decisions, action items, and highlights generated automatically, plus the ability to ask a question about a recording and jump to the moment it happened. See AI Assistant and how to chat with a video.
- Bring your own model — local LLMs through Ollama or LM Studio, or your own API key from Anthropic, OpenAI, OpenRouter, Grok, or any OpenAI-compatible provider. See Model config.
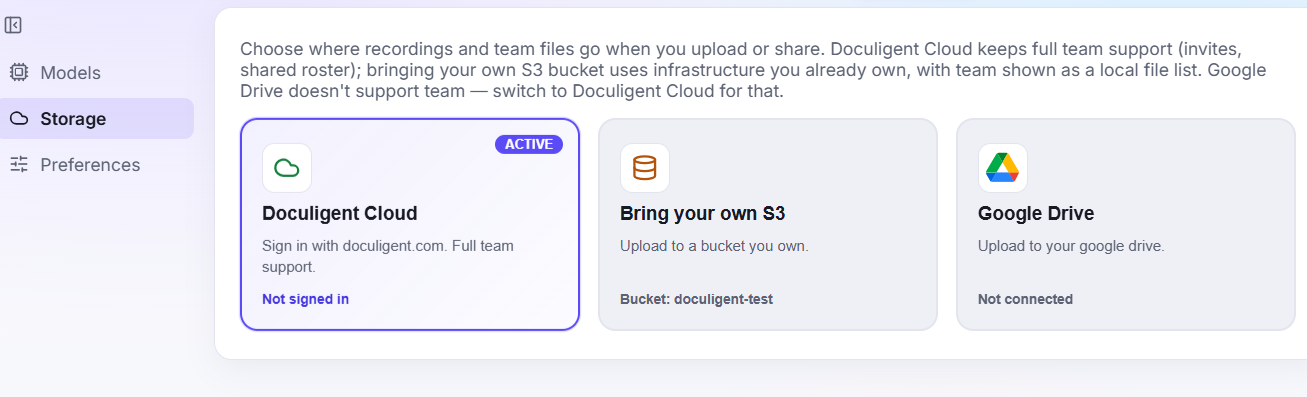
- A choice of storage — Doculigent Cloud, your own S3-compatible bucket, or Google Drive, rather than one vendor-controlled destination. See storage options.
- Sharing by email with the transcript and summary attached, instead of a separate upload step.
The Free plan covers unlimited local recording, transcription, and summaries with your own storage; paid plans layer on managed cloud storage, cloud transcription hours, and AI credits on top — see pricing for current plan details.
None of this makes Doculigent the right fit for everyone. Someone who just needs a five-second clip for a Slack message doesn't need an AI layer at all, and a team already standardized on another tool has a real switching cost to weigh against any of the above. For anyone assembling recording, editing, and understanding a video without stitching three separate tools together, though, it's built specifically for that combination — see how it compares to other tools if you're weighing it against something you already use.
Try Doculigent — the Free plan requires no card, and the code is open source if you'd rather read it than take our word for it. Download Doculigent.